DIY DAMP PROOFING KIT
DIY Damp Proofing Kit for treatment of rising damp!
DIY Damp Proofing Kit
Damp Proof Courses are an effective rising damp treatment. Our easy to use DIY Damp Proofing Kit contains everything you need to undertake DIY Damp Proofing, including our How to Install a Damp Proof Course Guide which provides detailed step-by-step instructions for successful installation.
Installation:
Our Damp Proof Course is installed by injecting our DampOut+ Damp Proof Cream into a series of 12mm holes drilled horizontally in the mortar bed. Our chemical Damp Proof Cream operates by waterproofing the pores (or capillaries) in the masonry, creating a barrier to the rising damp. No specialist equipment or specialist skills are required for installation of the Damp Proof Cream, only a 12mm Drill Bit and applicator gun, which are included in this DIY Damp Proofing Kit.
This DIY Damp Proofing Kit Contains:
- Applicator gun.
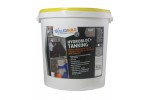
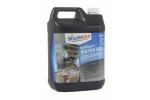
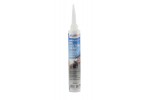
- 10 x DampOut+ Damp Proof Cream (400ml).
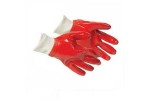
- PVC Gloves.
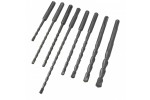
- 2 Certified Armeg Drill Bits (12 x 300mm and 12 x 160mm).
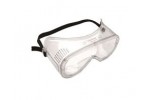
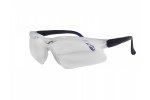
- Safety Goggles.
- Instruction Leaflet.
- Health and Safety Leaflet.
Damp Proof Cream Product Information:
Rising Damp:
Rising damp occurs as a result of ground water moving upwards through the permeable masonry walls of a building. This upwards movement is a result of the process called capillarity, caused by the electro-chemical attraction between ground water molecules and minerals on and in building materials.
New and more recently built buildings are likely to have been installed with an impermeable membrane during their construction to act as a barrier to rising damp. These can fail for a number of reasons including, age, movement in the walls, bridging and chemical breakdown of the damp proof course.
Further, if your building is older, it is likely that no damp proof course was installed during construction, resulting in your property being defenceless to rising damp.
Consequences:
Rising damp can result in aesthetic and structural damage to your property, such as damage to decorations and plasterwork, staining, salt and mineral deposits, crumbling mortar between brickwork and dampness which can lead to timber rot of joists and skirtings.
Damp Proof Cream:
Where rising damp is identified (see our How to Identify and Treat Rising Damp guide) it is possible to install or reinstate a barrier to prevent the rising damp moving upwards by using a chemical Damp Proof Cream to install a damp proof course.
Our Damp Proof Cream, DampOut+, is injected into holes drilled into the mortar bed course. Installation at the mortar bed joint is important as this represents the only route through which the rising damp can ascend through the permeable walls. By injecting the Damp Proof Cream into the mortar course, an effective damp proof layer can be formed, blocking the passage for rising damp. This damp proof layer is not a physical barrier; chemical Damp Proof Cream operates by lining the pores in the masonry with a waterproof resin, through which the rising damp rises.
Further, our Damp Proof Cream contains Siloxane, a silicon-based compound, which operates to neutralise the electro-chemical attraction between water molecules and mineral surfaces. This reduces capillarity of the water into the walls, which is the very cause of rising damp. This is an important property of an effective damp proof cream.
Re-plastering:
Where salts or minerals have been deposited in plasterwork by rising damp (for more information, click on How to Identify and Treat Rising Damp) it will be necessary to remove and replace the contaminated plaster. The reason for this is that, even after the installation of the Damp Proof Cream, the residual salts and minerals in the plaster work will absorb moisture from the air which will cause the appearance of damp on the surfaces of the walls. It is best to replace any contaminated plaster after the plaster has dried out after installing the Damp Proof Cream. An integral waterproofing additive should form part of your re-plastering specification. We recommend our Ultimate Pro Integral Waterproofer (Product No. N00210).
Further Information:
For detailed instructions on how to install damp proof cream, click on the following link: How To Install Damp Proof Cream, or call us for further information.
For further information on rising damp, follow this link to visit our guide on How to Identify and Treat Rising Damp.
Related Products:
Follow this link to visit Product Pages for Damp Proof Cream and other Damp Proofing Products.
Click here for a detailed account on how to install our Damp Proof Cream.
Preparation for the Damp Proof Cream:
1. Repair or install drains to carry away surface water.
2. If internal floors are below external ground level form trenches along the external face of the walls at least 150mm below the proposed Damp Proof Course level (where foundation depth allows). If approach is not feasible the damp proof course must be placed 150mm above external ground level and the internal walls tanked below the damp proof course to prevent lateral migration of moisture/salts.
3. Remove skirtings, fixings and render/plaster to expose the line of the proposed Damp proof course (mortar bed).
4.Internal plaster which may be contaminated with hygroscopic salts should be ‘cut back’ a minimum of 1m above the Damp Proof Course line or 300mm above the highest signs of dampness/salts.
5.Check flooring timbers for signs of fungal decay and repair/replace as appropriate.
6. Ensure wall cavities are cleared of debris.
Application of the Damp Proof Cream:
7. Walls vary in thickness and type of construction so it is essential these factors are taken into account before deciding on an appropriate drilling pattern.
8. Older properties may consist of several different styles of construction and the specification of drilling and injection should be carried out accordingly.
9. Damp Proof Course height should always be at least 150mm above the external ground level.
10. Vertical Damp Proof Courses should be provided to connect horizontal Damp proof courses where ground levels change and to isolate untreated wall areas (adjoining properties, garden walls etc.)
11. In most cases solid brick walls may be drilled/injected from one side only.
12. For cavity walls each leaf may be dealt with as separate 155mm thick wall. Alternatively, if preferred, drill through the selected mortar course, across the cavity, then drill the other leaf of brickwork to a depth of 90-100mm and inject in one continuous process (the physical properties of the Damp Proof Course ensure the Damp Proof Cream remains in contact with the surrounding mortar bed).
13. Always ensure the cavity is clear before treatment.
14. In random stone and rubble infill walls, as far as practically possible, follow the mortar course at the appropriate level. However, if the stone is of a porous type, it may be possible to vary the drilling location (mortar/stone) as long as the mortar bed perpends are treated
15. In the walls of greater than 350mm thickness it is recommended that drilling is undertaken from both sides at corresponding height.
16. In the case of drill holes becoming blocked these should be re-drilled just prior to injection or a new hole drilled nearby to ensure than an adequate volume of Damp Proof Cream is introduced
17. Drill 12mm diameter holes horizontally in the mortar bed at centres no greater than 120mm. The depth of hole required for various sizes of wall is shown in the table. For walls of intermediate thickness the depth of holes should be pro rata. Where the masonry is irregular, ensure the horizontal drilling pattern targets the base of all perpends of the course selected.
Injecting the Damp Proof Cream:
18. If wall is dry you MUST pre-treat the wall with water. A couple of hours before application fill the holes with water.
19. To inject the Damp Proof Cream use either a caulking gun or hand pump.
20. Use the gun/pump to establish a positive pressure. Insert the lance of the Damp Proof Cream application gun into the full depth of the pre-drilled hole. Squeeze the gun trigger and back fill each hole fully with Damp Proof Cream to within one centimetre of the surface. When treating cavity walls from one side make certain that the holes in each leaf are filled.
Finishing the Job:
21.On external faces of walls drill holes can be re-pointed using a matched mortar or plugged with plastic caps of a suitable size and colour.
22. On internal faces holes can be left open and plaster stopped short of the Damp Proof Course or covered with skirting boards.
Replastering:
23. The removal and replacement of internal salt contaminated plaster is an important part of effective damp proofing work (salts left by rising damp are hygroscopic and cause future staining independent of structural dampness). It is essential, therefore, to follow specific guidelines drawn up for dealing with the particular challenges posed by damp/salt affected surfaces. It is advisable to leave walls injected with Damp Proof Cream to dry for as long as possible, and for at least 14 days, before removing excess salts and commencing re-plastering.
24. An integral waterproofing additive should form part of the re-plastering specification.
Standard delivery rates and times apply for this product.

STEALTH UV SAFETY GLASSES - SMOKE

5mm x 160mm CERTIFIED SDS DRILL BIT


 Want to know which resin to use on your job? Use our


